
Nightmare, Month 6 |

Previous Nightmare Challenges |
|
Northern Cross

Northern Cross is a 6* Celerity ability. It deals physical damage twice and has a chance to Interrupt and Stop the target.
To craft it you will need:
10 Power Crystals
6 Ice Crystals
6 Wind Crystals
Northern Cross Record


One-time half price (gem/mythril) x11 draw!
Any 5★ relic you draw is guaranteed to be a unique Soul Break for 5★ Celerity characters!
thanks to Zurai001 and TFMurphy for the HP numbers and/or boss AI.
|
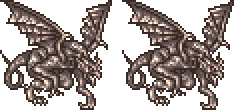
(V) Gargoyles Difficulty: 100 |
| Part 1 | Stamina 20, Rounds 1 |
【Rewards: First Time / Completion / Mastery】
|
|
【Target Score】
|
|
| Gargoyles | |||||||||
 |
|||||||||
| HP | |||||||||
|---|---|---|---|---|---|---|---|---|---|
| ~97000 each | |||||||||
| Elements | |||||||||
|
|||||||||
| Break Resistance | |||||||||
|
|||||||||
| Debuff Vulnerabilities | |||||||||
| Poison / Slow / Stop / Blind / Sleep | |||||||||
| Abilities | |||||||||
| Attack: Deal physical damage to one target. Critical: Deal moderate physical damage to one target. Separate: Revive a KO’d target to full health. Transfusion: Bring own HP to zero and fully recover one target. |
|||||||||
| Strategy | |||||||||
Beware of the never ending cycle of Transfusion and Separate. You can either disable them with Sleep/Stop or kill them fast with AoE. Recommended abilities: AoE, Halting Rumba |
|||||||||
|
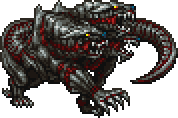
(VIII) Cerberus Difficulty: 110 |
| Part 1 | Stamina 30, Rounds 1 |
【Rewards: First Time / Completion / Mastery】
|
|
【Target Score】
|
|
| Cerberus | |||||||||
 |
|||||||||
| HP | |||||||||
|---|---|---|---|---|---|---|---|---|---|
| ~200000 | |||||||||
| Elements | |||||||||
|
|||||||||
| Break Resistance | |||||||||
|
|||||||||
| Debuff Vulnerabilities | |||||||||
| Blind | |||||||||
| Abilities | |||||||||
| ► Normal/Triple
Attack: Deal physical damage to one target. |
|||||||||
| Strategy | |||||||||
| Recommended abilities: Magic Breakdown, Shellga, Banishing Strike Recommended RW: SG/SS2, Scream |
|||||||||
|
(VII) The Four Saints Difficulty: 120 |
| Part 1 | Stamina 40, Rounds 1 |
【Rewards: First Time / Completion / Mastery】
|
|
【Target Score】
|
|
| The Four Saints | |||||||||

Gorkii, Shake, Chekov, Staniv |
|||||||||
| HP | |||||||||
|---|---|---|---|---|---|---|---|---|---|
| Staniv: ~81000 Shake: ~70000 Chekov: ~63000 Gorkii: ~81000 |
|||||||||
| Elements (Gorkii only) |
|||||||||
|
|||||||||
| Break Resistance | |||||||||
|
|||||||||
| Debuff Vulnerabilities | |||||||||
| Poison / Slow / Sap / Interrupt | |||||||||
| Abilities | |||||||||
| ► Gorkii
Attack: Deal physical damage to one target. ► Shake Attack: Deal physical damage to one target. ► Chekov Stare Down: Paralyze one target. ► Staniv Iron Ball: Deal physical damage to one target. |
|||||||||
| Strategy | |||||||||
| Recommended abilities: Break Fever, AoE Recommended RW: SG/SS2, Scream |
|||||||||
|
(XII) Mandragoras Difficulty: 130 |
| Part 1 | Stamina 50, Rounds 1 |
【Rewards: First Time / Completion / Mastery】
|
|
【Target Score】
|
|
| Mandragoras | |||||||||

(from left to right) Mandragora Prince, Alraune King, Onion Queen, Topstalk, Pumpkin Star |
|||||||||
| HP | |||||||||
|---|---|---|---|---|---|---|---|---|---|
| ~78000 each | |||||||||
| Elements | |||||||||
|
|||||||||
| Break Resistance | |||||||||
|
|||||||||
| Debuff Vulnerabilities | |||||||||
| Mandragora Prince: Slow / Blind / Interrupt Alraune King: Stop / Interrupt Onion Queen: Silence / Confuse / Interrupt Topstalk: Slow / Sleep / Interrupt Pumpkin Star: Blind / Sap / Interrupt |
|||||||||
| Abilities | |||||||||
| ► Mandragora Prince
Attack: Deal physical damage and Sleep one target. ► Alraune King Attack: Deal physical damage and Sap one target. ► Onion Queen Attack: Deal physical damage and Silence one target. ► Pumpkin Star Attack: Deal physical damage and Confuse one target. ► Topstalk Attack: Deal physical damage and Stop one target. |
|||||||||
| Strategy | |||||||||
They can be overwhelming if you don’t set up your first few turns well. I highly recommend Tauntaliate. Otherwise, use AoEs to quickly take them down. Recommended abilities: Draw Fire + Retaliate, AoE |
|||||||||
|
(Nightmare) Tonberry King Difficulty: ? ? ? |
| Part 1 | Stamina 1, Rounds 1 |
【Rewards: First Time / Completion / Mastery】
|
|
【Target Score】
|
|
| Tonberry King | |||||||||||||||||
 |
|||||||||||||||||
| HP | |||||||||||||||||
|---|---|---|---|---|---|---|---|---|---|---|---|---|---|---|---|---|---|
| Tonberry: ~66000 each Tonberry King: ~161000 |
|||||||||||||||||
| Elements | |||||||||||||||||
► Tonberry
► Tonberry King
|
|||||||||||||||||
| Break Resistance | |||||||||||||||||
|
|||||||||||||||||
| Debuff Vulnerabilities | |||||||||||||||||
| Tonberry (Phase 1): Paralyze / Slow / Stop / Interrupt Tonberry (Phase 2): Slow / Stop / Interrupt Tonberry King: Interrupt |
|||||||||||||||||
| Abilities | |||||||||||||||||
| ► Tonberry (Phase 1)
Chef’s Knife: Deal special physical damage to one target. (ignores DEF) ► Tonberry (Phase 2) Chef’s Knife: Deal special physical damage to one target. (ignores DEF) ► Tonberry It’s Sharp!: Deal special physical damage to one target. |
|||||||||||||||||
| Strategy | |||||||||||||||||
| This fight has 3 main phases: 1st phase features a lone Tonberry; 2nd phase features two waves of three Tonberries; and the last phase where you will face the Tonberry King himself.
Note that the Tonberries have only 5 MND, meaning a white mage with a decent MND stat (Tyro) can keep Tonberry Stop-locked for quite a long duration. PHASE 1 In this phase, you will fight a lone Tonberry:
Every turn Tonberry will take a step forward and attack a party member. Defeating this lone Tonberry will begin Phase 2. Stop him if you have to. He can also be Slowed and Interrupted (and also Paralyze but only for this phase) PHASE 2 When Phase 2 begins, three Tonberries will spawn:
You will immediately notice the colored circular tiles under the Tonberries. These colours correspond to different statuses: Red is Stop, White is Slow, Blue is Interrupt. The significance of these coloured circles is that whichever circle a Tonberry is standing on, the corresponding status effect will have double hit rate. As the Tonberries start on the Red circles, it is highly recommended that you use Halting Rumba to effectively land Stop on all three. From there it’s all about dealing as much damage as possible. AoEs are highly recommended. Other than being Stopped, the Tonberries can actually do some damage if left uncontrolled. Each turn before attacking, a Tonberry will move half a step forward. Other than at the beginning of Phase 2, If all three Tonberries are aligned vertically, your party will be hit by Nightmare Chef’s Knife. When the three Tonberries are defeated, a second wave of three Tonberries will spawn:
You will notice that the coloured circles have swapped places and that the Tonberries are not perfectly aligned at the start. The strategy does not change, control them and deal as much damage as you can. Do note that since there are no longer red circles (or rather none of them are on a red circle), Stop will not gain boosted hit rate. Defeating this second wave will begin the last phase. PHASE 3 Finally you face Tonberry King!
There are no gimmicks in this last phase, kill him before he kills you. He is pretty fast and since he’s immune to Slow and Stop, your only way of controlling him is by Interrupt.
Video #1: https://www.youtube.com/watch?v=eIuGSlPe_GM Recommended abilities: Halting Rumba, Dismissal, Tempo Flurry, AoE (Tornado Strike, Bladeblitz, etc) |
|||||||||||||||||


written by /u/fattybomchacha aka flip
Recent Comments